Backing Up TrueNAS With Borg
TrueNAS has plenty of fantastic backup options. However, I’ve been using borg for quite a while, and I wanted to continue doing so after switching to TrueNAS from Synology.
As TrueNAS was an entirely new platform to me, it took me a little to figure out what the recommended approach was for doing this. I therefore thought I should document this for anyone else who wondered the same in future!
Overview⌗
At a concept level, TrueNAS is a configuration, and therefore does not provide an internet-enabled package management system (by default), as they discourage modifying the base system. The method they recommend is to set up jails for any additional software you want installed — these jails get set up in your pool, and presumably persist upon upgrades because of it.
The Setup⌗
Create the Jail⌗
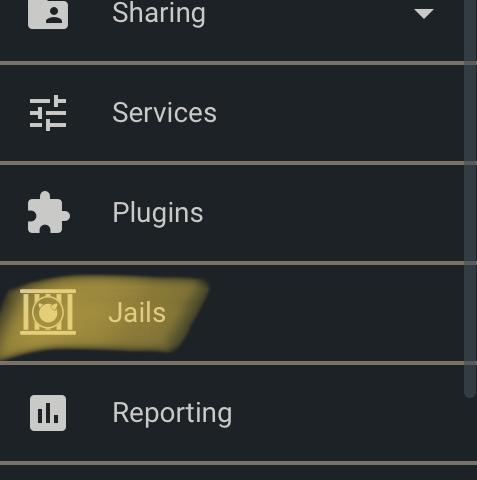
To begin with, log into your TrueNAS system, and head on over to the “Jails” section of your menu
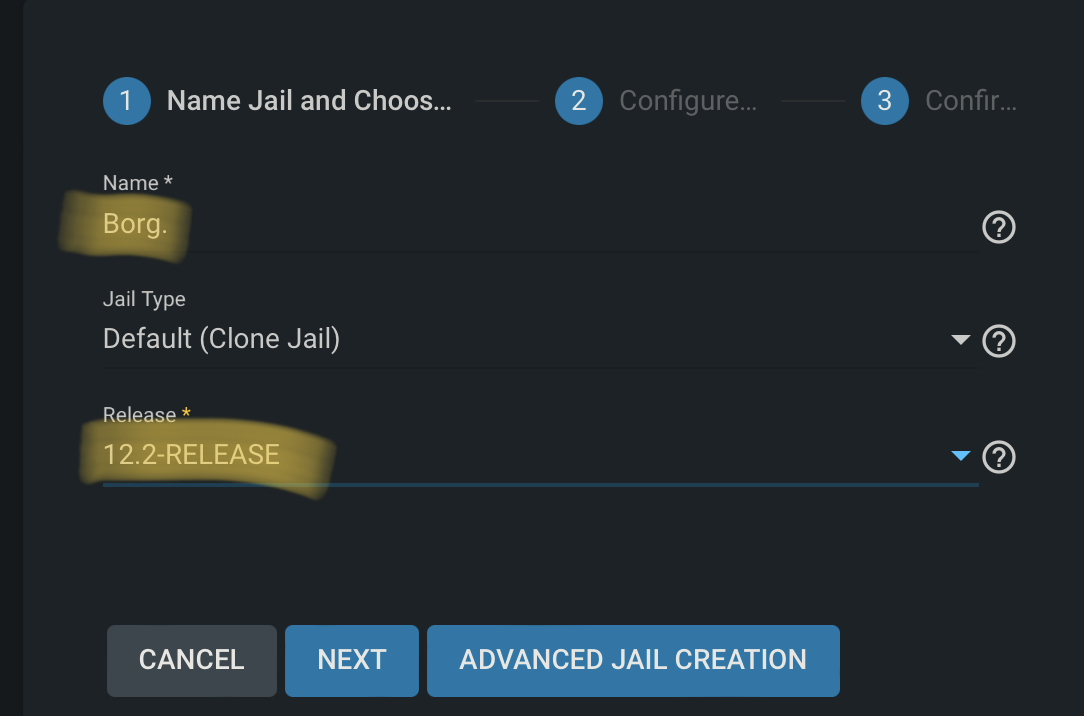
Click Add, and then fill out the name — “Borg” in our case. For release, I picked the most recent at the time — 12.2-RELEASE. Then, hit Next.
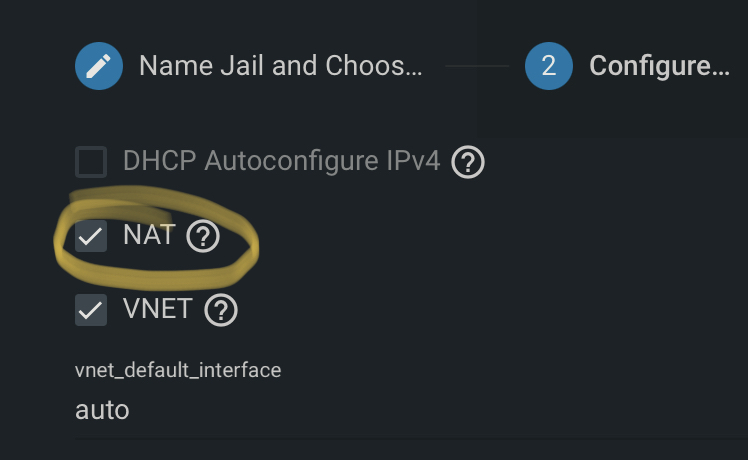
In the configuration section, you have a few options for network. In this case, as you only need outbound connectivity, I simply chose NAT, and click Next.
On the final page, simply Submit, then wait for the creation to finish.
Install Borg⌗
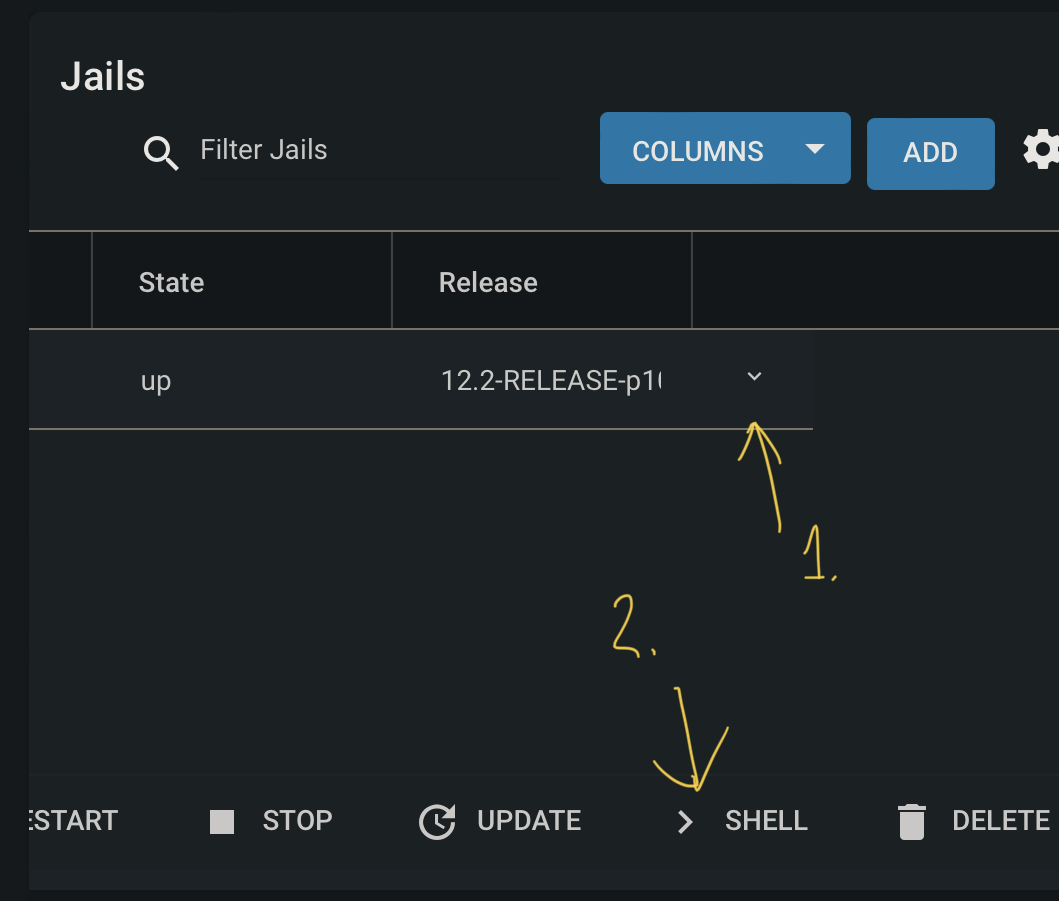
Back in the jails section, scroll across to the right, and click on the little down arrow to expand some addition options. In this area, click on Shell.
In the shell, type pkg update to begin updating the packages from the repositories. Then, once the packages have finished updating, you can do a search to see the package names. Do this with pkg search borg. In our case, we have two packages we’ll use:
py38-borgbackup-1.1.16_1
py38-borgmatic-1.5.18
Install these with pkg install py38-borgbackup py38-borgmatic. Once this is done, we’ll need to check out our mount points for Borg.
Mounting your Data⌗
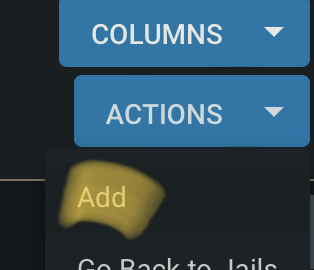
In the Jails section again, first click Stop and stop the container, then click on Mount Points. Click Actions, then Add.
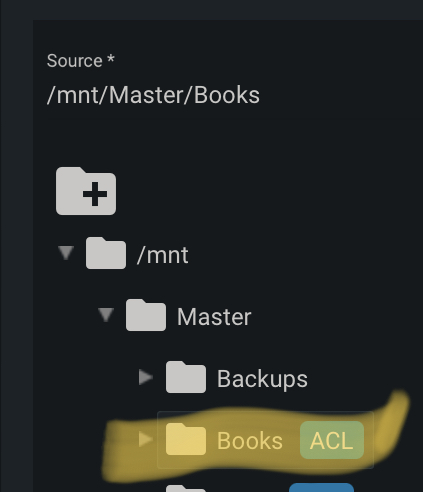
In the top section — the Source section, select your share from your NAS.
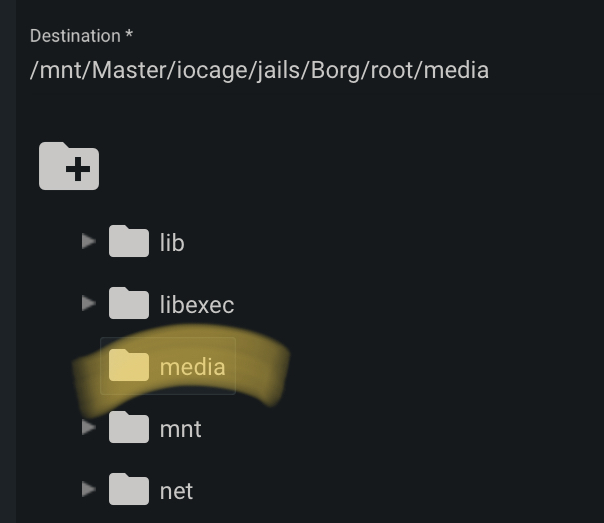
Scroll down to the Destination, and then choose where you’d like it to be mounted inside the Borg jail. I also select Read-Only at the bottom, to ensure that there’s no chance the original data can be modified.
Now, start up your Jail again (in the extended-arrow dropdown menu), ensuring any of the pools mounted in the jail are mounted on the host NAS before doing so.
Backing up your Data⌗
Now, what is out of scope here is how to use your specific backup service, but I’ll provide some general instructions that work with BorgBase — a great service focused purely on providing backup repositories for use with Borg. Another service I use for my data is Rsync.net — both are excellent products, but BorgBase is specifically focused around Borg.
I won’t give you all the instructions on how to use BorgBase, as they do that themselves, but once you’ve created your repo, you’ll need to initialise it within your jail. For ease of use, you can do this still in the interactive shell environment we used above on the Jails page — however, you can also execute commands in the Jail from being SSH’d into your host. To complete this, find out the Jail name, then use that to execute commands:

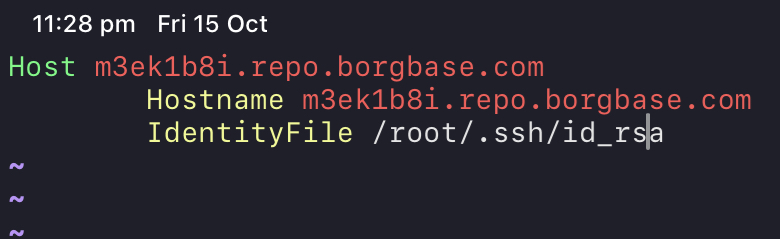
So from the interactive shell, first, generate an ssh key file, and then set it up with the host that is used for Borg (use your .ssh/config file like you normally would).
root@Iridium[~]# jexec ioc-Borg ssh-keygen
Generating public/private rsa key pair.
Enter file in which to save the key (/root/.ssh/id_rsa):
Created directory '/root/.ssh'.
Enter passphrase (empty for no passphrase):
Enter same passphrase again:
Your identification has been saved in /root/.ssh/id_rsa.
Your public key has been saved in /root/.ssh/id_rsa.pub.
The key fingerprint is:
SHA256:ZfFIuEtApp3wQZ2CYZVEjQz5BjgcFx2Ty1tvtbvmQKU root@Borg
The key's randomart image is:
+---[RSA 2048]----+
| ..oB#@B oo      |
|  +o+*O+=. +     |
|   ..+++ .+ o    |
|      = +o o.    |
|     . +SoE. .   |
|      . ..o .    |
|         ..  .   |
|           .o    |
|           oo.   |
+----[SHA256]-----+
root@Iridium[~]# jexec ioc-Borg cat /root/.ssh/id_rsa.pub
ssh-rsa AAAAB3NzaC1yc2EAAAADAQABAAABAQDA8Oz32j9hzWjmXDabm0LQOlszyUO7B6xOYCKvVfKkRSVrNw9TVwWdcstjG7nOFshVA4KAZFR8iv5ctT0zRJCNXxN2YeJstEQpBNEpK25d9uqMy0+/ebVFx7wcPplHLgpQso0aXPCRfLbvMLUQoyVVkklMrHVTUFLuFPpv1hSZ0in+0f8dy4Rf045jrZL5ZHFXT4eBNRRdL3VDfRh7ZTaCCsDnLf7JFrZQ89s10dVTi9fTz7jO+WLxjWkhKKvFKQovomux9iD9nBRlI6yF++VQlN5UyuPSjscR91cTtaWQ+NDdNeLywN/e1l26xTduDwvSAmsCR2P4I0ZuuI/59+cJ root@Borg
Adding the
.ssh/configfile
Initialise your repository:
# First execute the command
root@Iridium[~]# jexec ioc-Borg borg init -e repokey [email protected]:repo

# You may be prompted to allow a new host fingerprint
The authenticity of host 'm3ek1b8i.repo.borgbase.com (3.226.76.216)' can't be established.
ECDSA key fingerprint is SHA256:BmYzPJ4GEOilkv1z1nwhHMkkFv/FRyYOAcVRZKf0NVQ.
No matching host key fingerprint found in DNS.
Are you sure you want to continue connecting (yes/no)? yes
Remote: Warning: Permanently added 'm3ek1b8i.repo.borgbase.com' (ECDSA) to the list of known hosts.

# Choose your password

Enter new passphrase:
Enter same passphrase again:
Do you want your passphrase to be displayed for verification? [yN]: n

By default repositories initialized with this version will produce security
errors if written to with an older version (up to and including Borg 1.0.8).

If you want to use these older versions, you can disable the check by running:
borg upgrade --disable-tam ssh://[email protected]/./repo

See https://borgbackup.readthedocs.io/en/stable/changes.html#pre-1-0-9-manifest-spoofing-vulnerability for details about the security implications.

IMPORTANT: you will need both KEY AND PASSPHRASE to access this repo!
Use "borg key export" to export the key, optionally in printable format.
Write down the passphrase. Store both at safe place(s).


# Finally, back up your repository key

root@Iridium[~]# jexec ioc-Borg borg key export [email protected]:repo --paper
To restore key use borg key import --paper /path/to/repo

BORG PAPER KEY v1
id: 20 / f27496 4aaea4 b06e44 / 403086 2b74cb - 8e
 1: 86a961 6c676f 726974 686da6 736861 323536 - 14
 2: a46461 7461da 00dea3 211c3c a53b65 ba456b - 2e
SNIP
19: a4e471 b1bc98 6e1bc5 11f810 e7af88 8d8e8b - 3d
20: e11da7 766572 73696f 6e01 - cf
Finally, create the initial backup itself:
jexec ioc-Borg borg create [email protected]:repo::archive-name /etc --stats

Then, we’ll make our own borgmatic config, which can be used to streamline our backups. See the following for an example configuration which backups up /mnt/data as seen from inside the jail, to user@host:repository and excludes any directories with the .nobackup file present, applying retention rules but not regularly checking the archives:
root@Borg:~ # cat /etc/borgmatic/config.yaml
location:
    source_directories:
        - /mnt/data

    repositories:
        - user@host:repository
    exclude_if_present:
        - .nobackup
storage:
    encryption_passphrase: "PASSWORD-FOR-ENCRYPTION"
retention:
    keep_hourly: 24
    keep_daily: 7
    keep_weekly: 2
    keep_monthly: 12
    keep_yearly: 1
consistency:
    checks:
        - disabled
Scheduling The Job⌗
As we know from previous jls commands, we have our jexec command we can use. However, we need to schedule this regularly. For this, we use the web interface to set up Cron jobs.
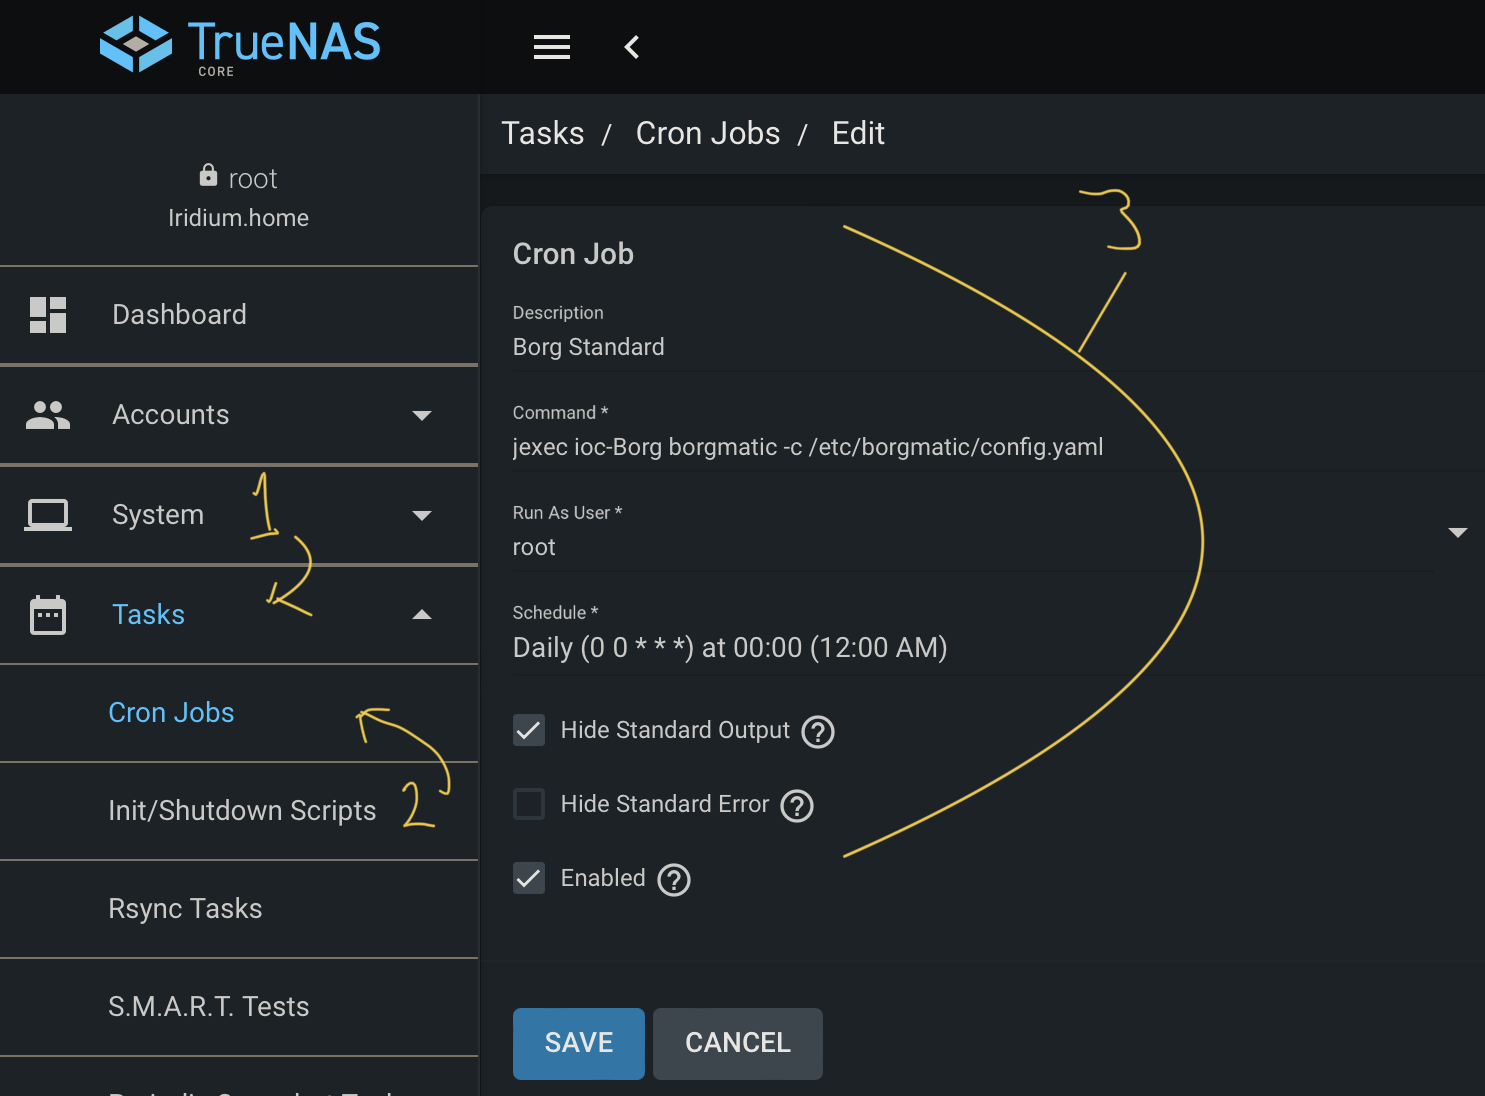
Go to Tasks > Cron Jobs and then click Add. Then fill in the name, and for the command, put jexec ioc-Borg borgmatic -c /etc/borgmatic/config.yaml — if you follow the errata below, you’ll need to enter the full path to borgmatic here — in my case, /root/.local/bin/borgmatic. Choose to run as root and whatever schedule you want, before saving.
Borgmatic Errata⌗
It appears that FreeBSD may have an issue with their Borgmatic distribution. To fix this, we have to install Borgmatic from the pip repo’s. To achieve this, we need to first link python, and install pip in the cage:
# Enter the shell
iocage shell Borg
# Create python link
ln -s /usr/local/bin/python3.8 /usr/local/bin/python
# Install Pip
pkg install py38-pip
# Remove old borg packages and install pip version
pkg remove py38-borgmatic
pip install --user borgmatic
We’ll also need to add a PATH modification for the pip install directory, so edit your .cshrc file, find the set path line, and add $HOME/.local/bin to edit before saving:
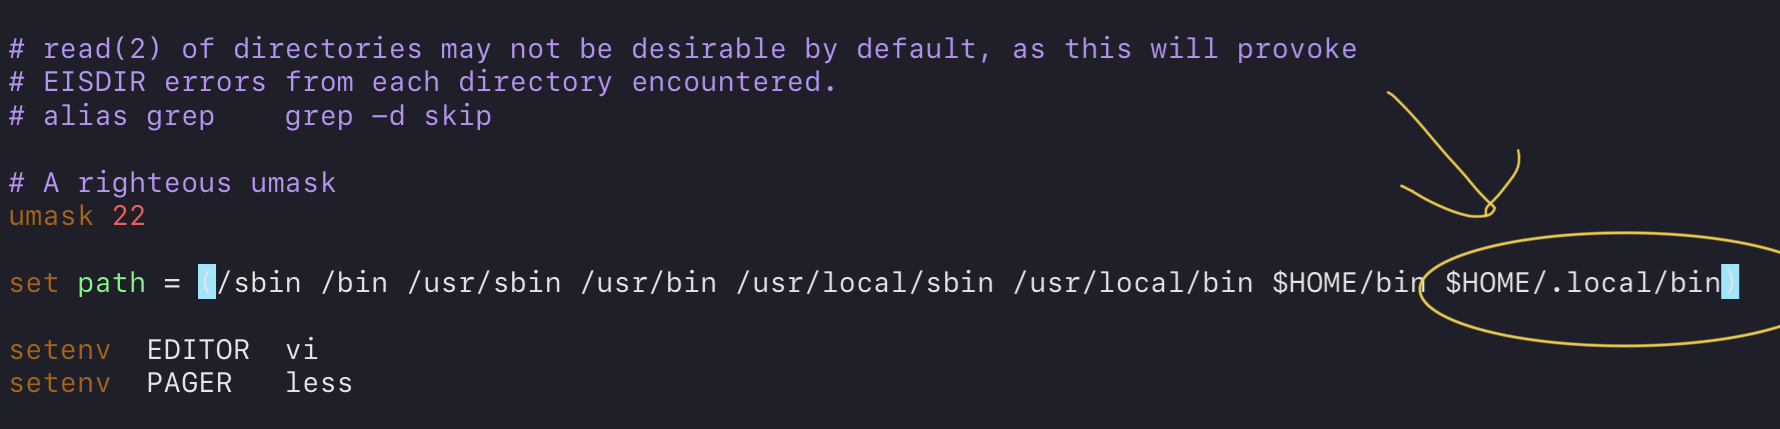
Save, exit, and then restart your shell (or source the file) to see the changes.
Summary⌗
By the end of this, you should now have a rough idea of how to backup your data with a combination of Borg and Borgmatic. I would strongly recommend BorgBase and Rsync.net for your backup destinations — I have been using both for years. BorgBase is excellent for an easy-to-use and secure out-of-the-box Borg repository destination, though they seem to have poorer peering with ISP’s (international traffic seems slower when compared to other hosts). They are aimed purely at Borg, so you get a very targeted user experience in this way. Rsync.net is great for large datasets, or if you want to send your ZFS pools directly across. It also works great with Borg as well, and they have special deals for it too on this specific page. It can even be perfect for you if you simply want one large data pool that you can use both for Borg, and for any other Unix-y interfacing items.
I did also try to assess Lima-Labs, but they were hard to get an account with. If anyone else has any good service suggestions, I’m all ears — please hit me up on Twitter @GlibGoat (for this, or any other comments/questions).